
Make Surefire Almond Royal Candies from Scratch
The most elegant woman I ever knew loved bridge, Siamese cats, and Almond Royals. She bought her confections from Sees Candies, but they’re even better (and much cheaper) when made from scratch.
The most difficult part of the process is choosing the brand of cocoa powder to use. Unlike bar chocolate (where price is generally at least loosely associated with quality), I find price and brand reputation have virtually nothing to do with how well any particular cocoa powder will taste in candy or baked goods. I’m currently using Hershey’s Special Dark cocoa powder, which gives better results than the high-cost/high-end brands I’ve tried. The only way to judge for yourself which you like best is to get two different kinds and make side-by-side batches. I know, life is hard. Whatever you choose, be sure it’s 100% cocoa powder, with no sugar added.
The chief enemy in virtually all candy making and other sugar work is crystallization. This recipe is very nearly bulletproof on that score. Crystallization is most likely when the sugar being used is all sucrose (table sugar). When all the sugar molecules are alike, anything that sets off the crystallization process acts like the first domino tipping over an entire chain. In this recipe, the sucrose is mixed in with invert sugars, whether you choose to use corn syrup or the two other options: Glucose or dextrose.
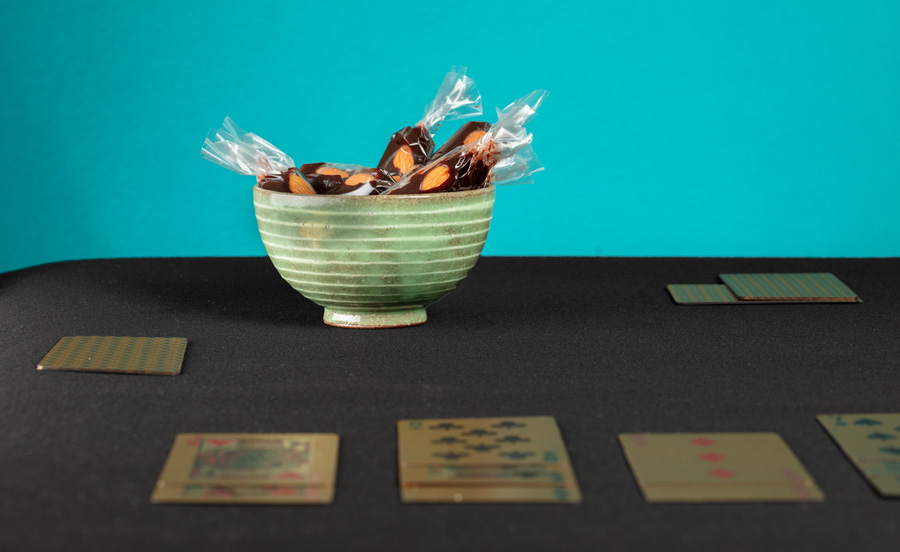
If you want to store and serve the finished candies the way they’re packaged at Sees, just cut some clear cellophane into rectangles about 4” by 6” and wrap each candy in a piece of it. An easier and more elegant way of portioning them is in candy molds (or really, any small mold that’s heat proof).

Almonds aren’t the only option, either. I often make these with hazelnuts instead (substituting the nuts as well as using hazelnut extract in place of the almond extract). Instead of nuts you can use any dried fruit. Dried pineapple works well, as do dried cherries or currants. Using pieces of candied ginger works especially well.
Recipe
Yield: About 24 candies
1 c (140 g) whole almonds
1 1/2 c (360 g) heavy cream
3/4 c (60 g) cocoa powder
1 1/3 c (267 g) sugar
1/4 t (1.5 g) salt
1/4 c (60 g) water
1/3 c (110 g) light corn syrup or low DE glucose. 110 g dextrose also works.
4 T butter
1 t (5 g) vanilla extract
1 t (5 g) coffee extract
1 t (5 g) almond extract
Lightly toast the almonds for 7-8 minutes in a 350° F (177° C) oven, just until fragrant. This can be done in advance.
If using candy molds, put nuts in the bottom of each mold.
Over low heat, combine the cocoa powder and heavy cream in a saucepan. Heat the cream, whisking constantly, until the cocoa is melted, just as if making hot chocolate. Be careful not to let the cocoa scorch on the sides or bottom of the pan. Set it aside.
In a large sauce pan over medium-high heat, whisk together the sugar, salt, water, and corn syrup (or glucose or dextrose, if using either of those instead). As the edges of the mixture begin to bubble, wash down the sides of the pan by brushing them liberally with water to prevent sugar crystallization, then leave the pan undisturbed until the syrup barely begins to color, at around 280-85° F (138-41° C). Using a heat proof spatula, gradually stir in the cream-chocolate mixture, adding just a few tablespoons at first and stirring to prevent any boil-over. Scrape the bottom and sides of the pan well with the spatula to completely incorporate the chocolate into the mix. Return the pan to medium heat and continue cooking until the mix is around 255° F (124° C), regularly scraping the sides and bottom of the pan to prevent any of the chocolate from scorching. You can target five degrees lower for softer candy, or five degrees higher for a harder chew.
That last step takes longer than you’d guess. Once the cream mixture is incorporated the temperature of the mix drops below 220° F, then rises steadily until it reaches around 225°, at which point the temperature will stall for 3-5 minutes as water from the cream boils off. Once the temperature starts rising again and approaches 245° F (118° C), the mixture will thicken, and from that point on, temperature readings in different parts of the pan will vary by 5 to 10 degrees. If using an instant-read thermometer, move the probe around the pan and assume the temperature of the mix is at about the mid-point of the readings you get. If using a candy thermometer, stir the mix all around the probe to blend the hotter and cooler parts of the candy mass together.
When the mixture reaches 255° F (or higher or lower, depending on the consistency you want), remove the pan from the heat and immediately add the extracts and butter, stirring the mixture until the butter is melted and incorporated and the mixture is smooth and glossy.
If using candy molds, immediately pour the molten mixture into the molds. Wait several minutes and puncture any bubbles that rise to the surface. Chill them in the refrigerator to make unmolding easier.
If not using molds, let the mixture cool in the pan 10 or 15 minutes, then pour it out onto a stone slab or onto several silicon mats. Let it cool until it’s the texture of putty, then portion it into 20-25 gram balls. Roll each one into a short cigar shape, press two nuts into each, then wrap each one in cellophane, twisting the ends firmly to seal the candies in their wrappers.
-
I don’t cook, I just eat. Where do I put in my order?
Mar 15, 2021 7:59PM
Like this Recipe? Leave a Comment.
Your email address will not be published.